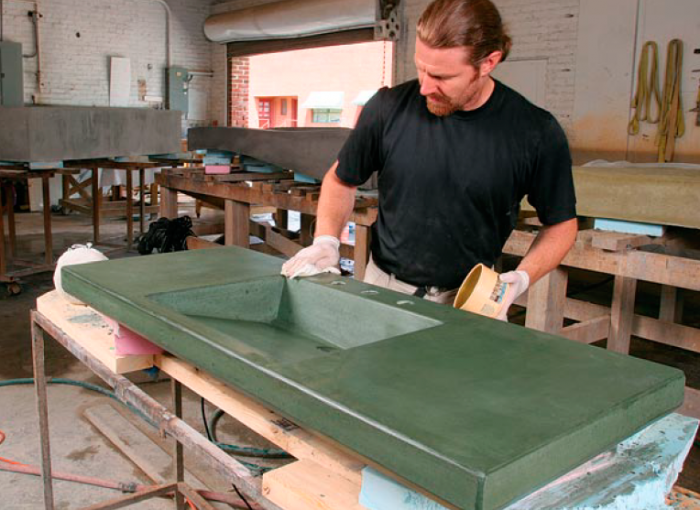
A Concrete Countertop and Sink in a Single Pour
Formed and finished with off-the-shelf materials, a vanity top takes shape upside down.
Magazine Extra:View step-by-step photos that detail how tomake and remove the three-part formafter the concrete cures.
Custom concrete countertops can be one of the most-original, dynamic design features in a home. With its almost unlimited flexibility in color, shape, and character, concrete is incredibly cool and extremely functional, especially when used for a countertop with an integral sink.
Concrete is easy to mix and use, but there is a learning curve to working with it. By combining commonly practiced form-building methods with our own trial and error, we’ve developed an efficient way to build a relatively complex and striking concrete countertop/sink. Here, we illustrate how we make a vanity top using a contemporary sink-bowl design. We like this sink because it is simple to construct and functional for hand-washing, but many other bowl designs are possible using these same techniques.
Getting the right mix is tricky
No one can tell you exactly how to mix a perfect batch of concrete, largely because so many variables go into one. For starters, you have to consider the proportions and properties of the basic materials you’re using, such as aggregate, sand, and cement. For example, the type of sand, its fineness, and the amount of water it’s already holding affect the consistency of the mix. The sand we used for this countertop was a mined silica sand. When choosing sand, keep in mind the grading of the size of the particles in the sand. Simply put, you want to use a good variation in sizes, and a good amount of fine-grained sand. We also use river sand, which is dredged and screened as opposed to mined. River sand has a larger variation in color and size gradation than mined sand. In most areas, masonry sand is readily available, and it works, too. We don’t use it, though, because it results in a less favourable final color than the white sand we prefer.
Additional ingredients affect the concrete as well. Fibers can be added for strength, as can fly ash, but they affect the consistency of the mix. Other ingredients, such as water reducers and plasticizers, help to keep the mixture together while improving the flow of the concrete mix within the form. The type and the amount of colorant also can affect the character of the mix, as can the temperature and the humidity in the workspace.
The possibilities are almost endless, and your solution depends on the results you’re looking for as well as the materials and the environmental conditions on hand. Some companies market specific ratios for the mixes they use and sell, but everybody’s basically finding similar solutions. We recommend a ratio of approximately 3 parts sand to 1 1⁄2 parts 3⁄8-in. gravel to 1 1⁄4 parts type-1 portland cement.
The ultimate goal is to have your concrete consolidate and flow well. Creating a mix that stays together and still remains fluid can be a real balancing act, however. If you’re new to concrete, you might be tempted to add more water to the mix to improve its flow. Keep in mind that the results are always better if you use a low proportion of water because a drier mix makes for a denser, stronger finished product. We try not to exceed a 45% water-to-cement weight ratio. A water reducer and plasticizer like the one we use (Super Sealz, www.blueconcrete.com) lowers the amount of water needed to maximize flow.
For more photos, drawings, and details, click the View PDF button below: