

How to Clean a Faucet Aerator
It's a simple repair, but cleaning an aerator can make a big difference to water flow from the faucet.
水龙头中控室内空气与水混合,最小化splashing and reducing the amount of water used (and the energy required to heat hot water) without reducing the effectiveness of the water stream. An aerator contains a screen and a water reducer/aerator washer, and these little items have a habit of collecting bits of naturally occurring mineral sediment from the water. What you’ll notice is a reduced water flow at the spout (on both hot and cold) and/or a nonsymmetrical spray coming from the spout.

| 什么可能出错:Despite your best intentions, it’s easy to let the parts of an aerator fall out when you’re removing it. To prevent permanent loss of any parts, put the stopper in the sink drain before removing the aerator. If you take the aerator away from the sink, to keep from losing parts, you can disassemble it over a bowl. |
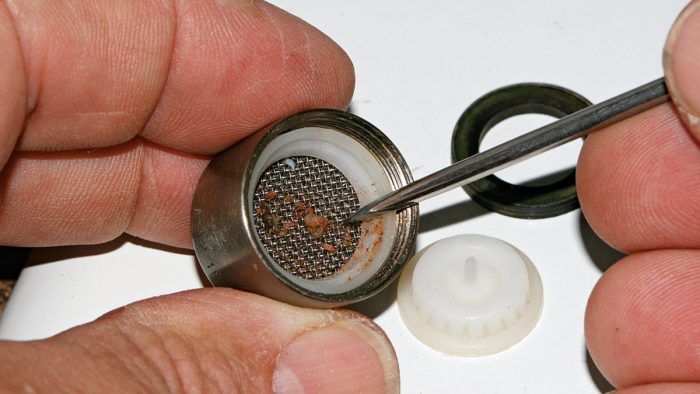
To remove the aerator from the faucet simply turn it counterclockwise. Drop it straight down so you don’t lose any internal parts, especially the thread-sealing gasket. The threads can be either inside or outside the cap. If the cap is stuck, you will need piers to turn it (tape the jaws with electrical tape to minimize scratching).1Look inside the center area for sand, silt, and other waterborne debris2. Take the center section out to check for further debris, noting the order in which things come apart3. Check for anything stuck in the screen4. In the flow reducer, look in the tiny side holes5and the center hole of the white button for debris6. If you do not put all the pieces back together properly, there will be a leak or the water flow will not be a smooth aerated flow7,8,9.


Cleaning ScreensSometimes you can remove whatever is clogging an aerator by simply flushing the screen or reducer with water, turning the parts under the spray to dislodge the sediment. Soaking the parts in vinegar can also help dissolve calcium deposits. For really stubborn bits of debris, try cleaning the holes with a toothpick, large sewing needle or other small, sharp tool.
|

 Excerpted from Taunton’sPlumbing Completeby Rex Cauldwell.
Available atAmazon.com.
