Scribing a Skirtboard to an Existing Stair
当你不得不pu的指南t in a skirtboard the hard way.
Typically,skirtboardsare sandwiched between thestair stringerand the wall, and are installed before thetreads and risersthat abut them. That’s the easy way. In a recent remodel, I had to put in a skirtboard the hard way—with the treads and risers already in place.
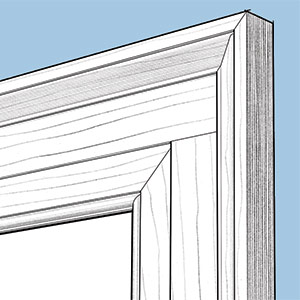
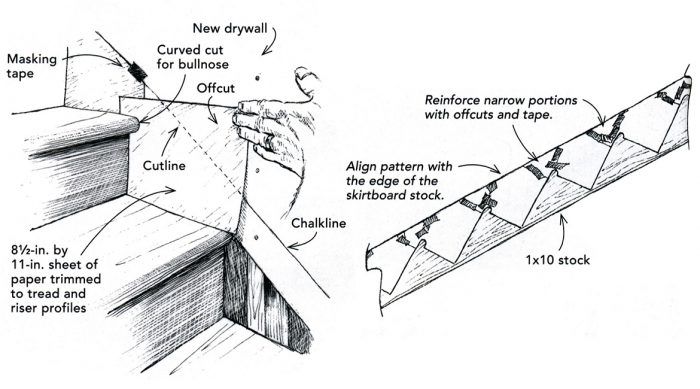
As shown in the drawing, I made a pattern out of taped-together 81/2-in. by 11-in. sheets of paper. Without any measuring, this method yielded an exact profile of a stair that had its share of crooked lines.
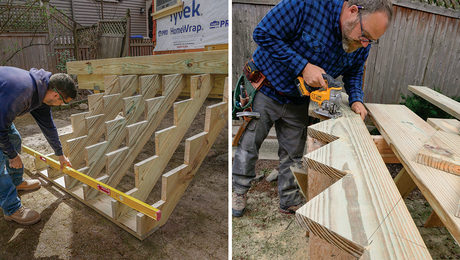
First, I snapped a diagonal chalkline at the angle of the stair. This was an arbitrary distance, between 2 in. and 3 in. above the tread nosing. The chalkline represented the top of the skirtboard. Working from the top, I next cut, fit, and taped together pieces of printer paper, filling each triangular space from the tread and riser up to the snapped line. I used scissors to cut the curve around the tread bullnose and tapered the riser cuts in places where the risers weren’t plumb. I used the offcut triangles from each piece to reinforce the narrow parts of the pattern.
This process yielded a 14-ft.-long pattern, which I cut away from the wall and taped to a 1×10 piece of skirtboard stock. I aligned the long edge of the pattern with the stock and carefully traced the outline. This paper-doll pattern worked like a charm.
—Forrest McCanless, Oxford, GA
Edited and illustrated by Charles Miller
From Fine Homebuilding #196